Well. No discernable progress. But I did watch 2 movies, so there's that.
Remind me next time to put smaller things on the list.
Who am I kidding? That's not going to happen.
Anyway.
Finished: 48
In Process: 10
Percent finished: 47.52%
Left to go: 52.48%
Finances/Giving (7/12) [in Process: 0]
1. Get Emergency Fund up to $1000 [Done 15 March 2011]
2. Pay off and close Chase Visa
3. Pay off and close Target Visa
4. Get Emergency Fund up to 3 months (~12,000)
5. Get a used truck
6. Put a $50 bill in the second collection basket [Done 5 November 2011]
7. Put a $100 bill in the second collection basket [Done 14 April 2012]
8. Donate to the Food Shelf 10 times ($25 or equivalent) (10/10) [Done 28 October 2011]
9. Leave a 100% tip 5 times (5/5) [Done 15 October 2011]
10. Choose 2 kids from the Jesse Tree during Christmas & get them presents [Done 29 November 2011]
11. Give to a family in need during the holidays
12. Buy a scratch-off lottery ticket & donate 25% of the winnings to charity [Done 18 September 2010]
House Inside (7/12) [In Process: 2]
13. Hang up 5 pictures (5/5) [Done 17 November 2010]
14. Frame Tree picture [Done 9 September 2010]
15. Paint back room and closet [Done 13 October 2010]
16. Paint hall storage closet & set up shelves [Done 17 August 2010]
17. Spruce up front door area (outside: welcome mat, flower pots/ inside: bench, mirror, lamp)
18. Finish basement
19. Back door/entryway re-do
20. Repaint & redo my office
21. Hang curtains or blinds in master bedroom & the Kid’s room [Done 18 October 2010]
22. Get dining room chairs
23. Repaint Laundry Room [Done 19 October 2011]
24. Repaint/redo master bathroom/closet [Done 5 October 2010]
House Outside (3/12) [In Process: 2]
25. Plant 5 trees in yard (5/5) [Done 4 August 2012]
26. Put in back flower bed
27. Paint Storage Shed same color as house
28. Back entryway outside re-do (transition between steps and red rock)
29. Build garage
30. Put in front flower bed
31. Put in front tower flower bed
32. Put in side flower bed
33. Level out north side of house & put down the decorative rock
34. Get covers for grill & fireplace
35. Get rid of stumps in back yard [Done 28 August 2010]
36. Get a flag for front porch (and install said flag) [Done 3 July 2011]
To Do/Watch/Read (6/12) [In Process: 4]
37. Watch 101 movies (63/101)
October 2012
• Pitch Perfect
• Act of Valor
38. Read 101 books (219/101) [ The 101 was done 2 May 2011]
39. Go to a Cowboys-Vikings game
40. See 5 Minnesota Tourist Attractions (0/5)
41. Visit 5 art galleries in Minnesota (1/5)
42. Watch all seasons of “24” (3/8)
43. Watch all seasons of “MI-5” (10/10) [Done 16 April 2012]
44. Complete a crossword puzzle book
45. Watch 5 documentaries (5/5) [done 10 February 2011]
46. Read 5 Non-fiction books (5/5) [Done 3 November 2011]
47. Donate 100, 000 grains of rice on FreeRice.com (100,000/100,000) [Done 31 May 2012]
48. Do 5 things from the “365 Things to do in the Twin Cities” (5/5) [Done 17 December 2011]
Health (2/12) [In Process: 0]
49. Walk to work 30 times (30/30) [Done 14 March 2011]
50. Bike around the lake
51. 175
52. 165
53. 155
54. 145
55. 135
56. Get eyes checked
57. Get new glasses or contacts
58. Get annual physical [Done 16 September 2010]
59. Do the 200 sit-ups challenge
60. Track my progress with Wii Fit for 28 consecutive days.
Grown-up/Family stuff (3/12) [In Process: 1]
61. Change life insurance beneficiaries
62. Write wills
63. Write living wills
64. Get family picture taken
65. Send out Christmas cards with aforementioned family picture on it
66. Host Brother/Sister Christmas party [Done 18 December 2010]
67. Have a family board/card game night 5 times (2/5)
68. Buy a new “grown-up” outfit (shirt/pants) [Done 23 July 2011]
69. Take a family vacation
70. Make a picture family tree
71. Get first aid certified
72. Get the Kid a car safety kit for her car [Done 28 December 2010]
Spiritual/Church (5/12) [In Process: 2]
73. Learn the Rosary Prayers
74. Go to a Latin Mass
75. Go to daily Mass for a week
76. Donate time, talent, or treasure for the CCW Bazaar [Done 1 October 2010]
77. Read the Tao te Ching [Done 18 September 2010]
78. Get a new St Christopher Medal
79. Do the Advent readings and wreath one year [Done 7 January 2011]
80. Do the Lenten readings one year [Done 9 April 2012]
81. Do the Rice Bowl project one year [Done 17 April 2011]
82. Light an intention candle 10 times (10/10) [Done 25 August 2012]
83. Attend Mass in the Basilica
84. Attend 2 Lenten dinners
Food (10/11) [In Process: 0]
85. Make a cake & icing (or cupcakes) from scratch [Done 24 July 2010]
86. Try 3 new restaurants (3/3) [Done 17 June 2011]
87. Do one week of meal planning [Done 31 December 2010]
88. Do one month of meal planning [Done 3 July 2011]
89. Eat 1 serving of fruit a day for a week (7/7) [Done 12 July 2010]
90. Try a new recipe [Done 1 October 2010]
91. Make cookies from scratch [Done 23 September 2010]
92. Try a different flavor ice cream (no vanilla/chocolate) [Done 12 August 2010]
93. Limit Diet Coke to 2 servings per day for 1 consecutive week (0/7 days)
94. No fast food for a month [Done 9 April 2011]
95. Try 5 different kinds of apples (5/5) [Done July 2010]
Just Because (4/6) [In Process: 0]
96. Donate hair to Locks of Love one more time [Done 3 September 2012]
97. Take part in a pub quiz [Done 16 January 2011]
98. Complete a 500+ piece puzzle
99. Fly first class
100. Start a Tumblr [Done 8 July 2010]: http://daughteroftime.tumblr.com
101. Do a 365 day photo challenge [Done 31 December 2011]

Tuesday, November 13, 2012
Thursday, October 25, 2012
31 {More} Days of Pinterest: Day 12 University of Minnesota Pride
I have some friends who both went to the University of Minnesota. I have a daughter who is currently going to the University of Minnesota. They love all things Gopher. They probably bleed Maroon and Gold.
So what to get them for Christmas? I have a "U of M Golden Gophers" Pinterest board where I put things that catch my eye with them all in mind.
Pretty sure this is awesomely cool:
 (Originally found at: texowadesign's etsy shop)
Dangit. They're sold out. I know I could probably ask them to make another, but maybe I could make a less cool version myself.
So I opened up my Microsoft Publisher and gave it a whirl.
For each line I created a text box, used Impact font in varying font sizes, and justified the text. I played around with the order of the items, and made sure to try and keep the spacing so it looks good.

Once I was happy with how it looked, I changed the font to the mustard-gold-y color that kind of looks right. I know I could go find the exact color, but eyeballing it is OK too.

After that, since each line was in a separate text box, I formatted the boxes and did a fill color of maroon in each one.


Once I had all that done, I did a 'Select All', then a 'Copy' and pasted it all into Paint. Then I saved it to my desktop as a .jpg so I had a shot at finding it again. I then opened it using the Microsoft Picture Manager program, and cropped the white edges.
Here's the finished picture:

I'm still debating whether to print it as a .jpg or just go with the Publisher document. I can tell the difference in clarity, but I might be the only one.
To see my other 31 {More}Days of Pinterest projects, click on the image below, and it will take you to my original post.

So what to get them for Christmas? I have a "U of M Golden Gophers" Pinterest board where I put things that catch my eye with them all in mind.
Pretty sure this is awesomely cool:

Dangit. They're sold out. I know I could probably ask them to make another, but maybe I could make a less cool version myself.
So I opened up my Microsoft Publisher and gave it a whirl.
For each line I created a text box, used Impact font in varying font sizes, and justified the text. I played around with the order of the items, and made sure to try and keep the spacing so it looks good.

Once I was happy with how it looked, I changed the font to the mustard-gold-y color that kind of looks right. I know I could go find the exact color, but eyeballing it is OK too.

After that, since each line was in a separate text box, I formatted the boxes and did a fill color of maroon in each one.


Once I had all that done, I did a 'Select All', then a 'Copy' and pasted it all into Paint. Then I saved it to my desktop as a .jpg so I had a shot at finding it again. I then opened it using the Microsoft Picture Manager program, and cropped the white edges.
Here's the finished picture:

I'm still debating whether to print it as a .jpg or just go with the Publisher document. I can tell the difference in clarity, but I might be the only one.
To see my other 31 {More}Days of Pinterest projects, click on the image below, and it will take you to my original post.
31 {More} Days of Pinterest: Day 11 Rocking the Side of the House
Yep. Rocking...as in putting down rocks. Also, rocking from the soreness the next day.
We've had a pile of decorative rock hanging out by our driveway for, oh, years. A few of them. Like 3. Enough so that it all is mostly invisible to me simply because it's always been there.
Sadly, I don't have a picture of it.
I do, however have some pictures of where we put the rock. Only the beginning and the end, mind, mostly because the camera battery ran out of juice midway through and had to be recharged.
I was looking for low-maintenance outside projects on Pinterest, and came across a few pictures that had rock patios. It got me thinking that hey, we already HAVE rocks, and a place that was in need of help.
No, it really needed help.
Here's a couple of before shots. Well, not exactly true befores because I'd already started pulling weeds and vines. Close enough.

Nice, huh?

Really classy. And oh, so welcoming. Sure, it's the back door, but that's the door that everyone uses around here.

We started by pretty much clearing it out. It already looked 5000% better. Steve tried to till it so that we could level it out, but the ground was way too hard.

So we watered it for a few days, then after a couple of mini-rainstorms, we came back to it. The camera was charging at this point, and I wasn't about to waste the beautiful day waiting for it, so there's no more pictures until the end.
We took some shovels and turned the dirt to give the tiller something to bite into, and picked out some larger rocks that had worked their way up.
Once it was tilled, we took rakes and leveled it out. Then we laid permeable landscape fabric down, making sure to overlap the layers between the rows. We used the landscape fabric because it allows water to drain--this is important because this is on the Northwest corner of the house, which gets snow, but not a whole lot of sunshine.
Then it was time to lay the rocks. Oh, my. We started by anchoring the overlapping fabric by putting rocks down on top, then on the corners. I found that using a rake to level it was slower than just using my foot, so that's what I did. It'll still settle over the winter, but that's ok. We have plenty more rock if needed.
Here's where we ended:


We're using the board as a temporary-over-the-winter edge. I think we may turn the corner of the house & rock all the way down the north side, especially since it gets hardly any sun, and it's all weedy and not particularly attractive right now.
To see my other 31 {More}Days of Pinterest projects, click on the image below, and it will take you to my original post.
Wednesday, October 17, 2012
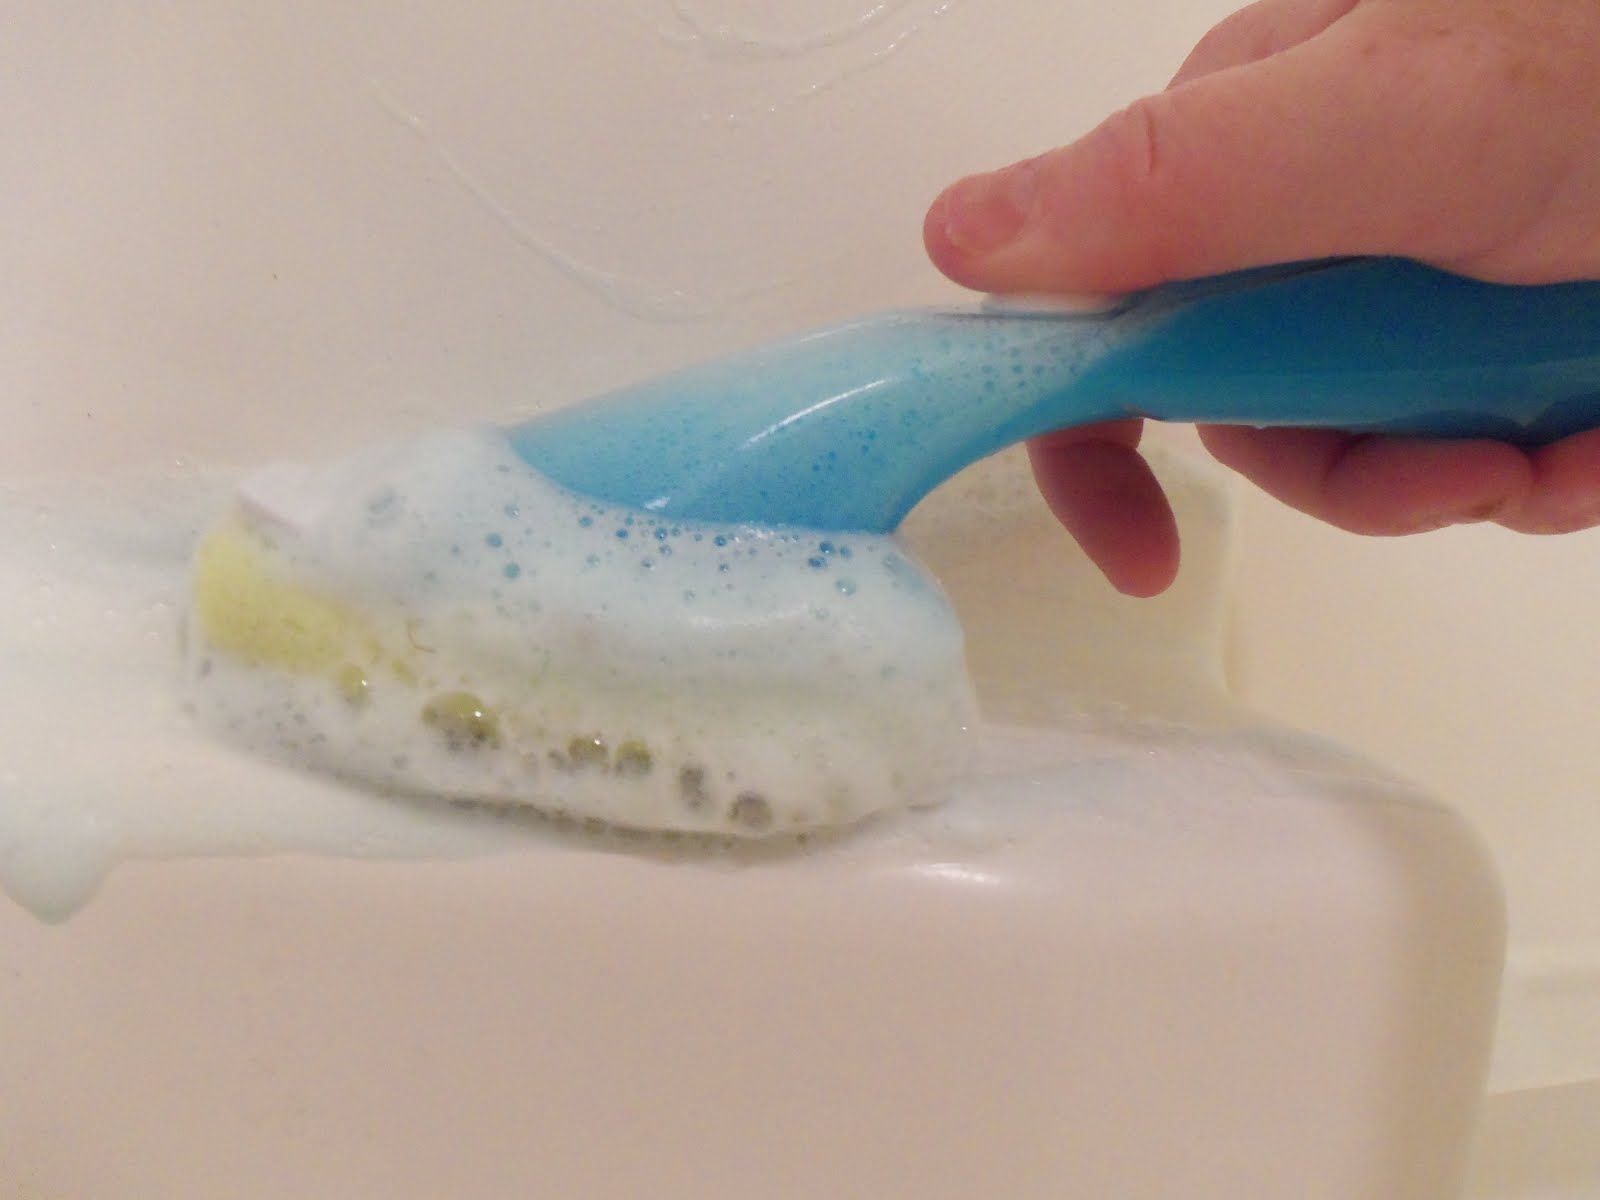
31 {More} Days of Pinterest: Day 10 Easy Tub Cleaner
Like I said before, I really don't like cleaning the bathroom. But the thing that I REALLY don't like cleaning is the bathtub.
So when I saw this pin on Pinterest from The Craft Patch, it was right up my alley.

Spray the cleaner on, come back in an hour, and wipe it down? Yes, please.
Since I had all the things already out for my Shower Scrubber project, I found an empty spray bottle and made a bigger batch.
I started with the vinegar:

Then I added the Dawn dishsoap:

I shook it up to mix it a bit better, and opened the shower curtain. Warning: These before pictures are not edited. Seriously. ICK.


So, I sprayed the solution ALL OVER THE TUB.

And then I walked away. Yep. At that point I didn't know if this would work, but I'd come too far to go back, so I figured I'd just see it through.
Thing is, I forgot about it.
I actually came back over FIVE hours later. I had to re-spray some sections, but it worked. IT WORKED!!!!
Here's an un-edited photo of the after:

AMAZING.
Next time I won't spray quite so much cleaner at a time. When I was trying to rinse the tub, the bubbles from the dishsoap were ridiculous. Also, on problem areas, I might take the shower scrubber and give them a good once over.
To see my other 31 {More}Days of Pinterest projects, click on the image below, and it will take you to my original post.
31 {More} Days of Pinterest: Day 9 Shower Cleaning Done Easy
I seriously hate cleaning the bathroom. I don't know why that is, considering how happy it makes me when it is clean, but there you go.
When I saw this pin on Pinterest I thought it made sense.

Sometimes I can think outside the box. Sometimes I can't. I probably wouldn't have looked at this and thought, "Oh, hey-I can clean the shower with that." That's the beauty of it all...someone else can be brilliant and I can say, "Duh."
Anyway, I got out the vinegar, Dawn dishsoap, and my new dish scrubber thing to figure this out.

The mix is 1:1 of vinegar and Dawn dish soap. Everything I read said that the original Dawn was the best, and considering I had no other frame of reference, I just followed the directions.
I put it in the handle and went to work.

And WOW. It works! I think I'd do a couple of things differently next time. First, I'd only put in what I was intending to use, because I can't figure out how to make it stop oozing out of the scrubber. Second, I'd spray the wall of the shower first and let it set for awhile THEN spray it.
For as much as I don't like the initial smell of vinegar, and as much as I don't particularly care for the scent of original Dawn, this one's a winner.
To see my other 31 {More}Days of Pinterest projects, click on the image below, and it will take you to my original post.
When I saw this pin on Pinterest I thought it made sense.

Sometimes I can think outside the box. Sometimes I can't. I probably wouldn't have looked at this and thought, "Oh, hey-I can clean the shower with that." That's the beauty of it all...someone else can be brilliant and I can say, "Duh."
Anyway, I got out the vinegar, Dawn dishsoap, and my new dish scrubber thing to figure this out.

The mix is 1:1 of vinegar and Dawn dish soap. Everything I read said that the original Dawn was the best, and considering I had no other frame of reference, I just followed the directions.
I put it in the handle and went to work.
And WOW. It works! I think I'd do a couple of things differently next time. First, I'd only put in what I was intending to use, because I can't figure out how to make it stop oozing out of the scrubber. Second, I'd spray the wall of the shower first and let it set for awhile THEN spray it.
For as much as I don't like the initial smell of vinegar, and as much as I don't particularly care for the scent of original Dawn, this one's a winner.
To see my other 31 {More}Days of Pinterest projects, click on the image below, and it will take you to my original post.
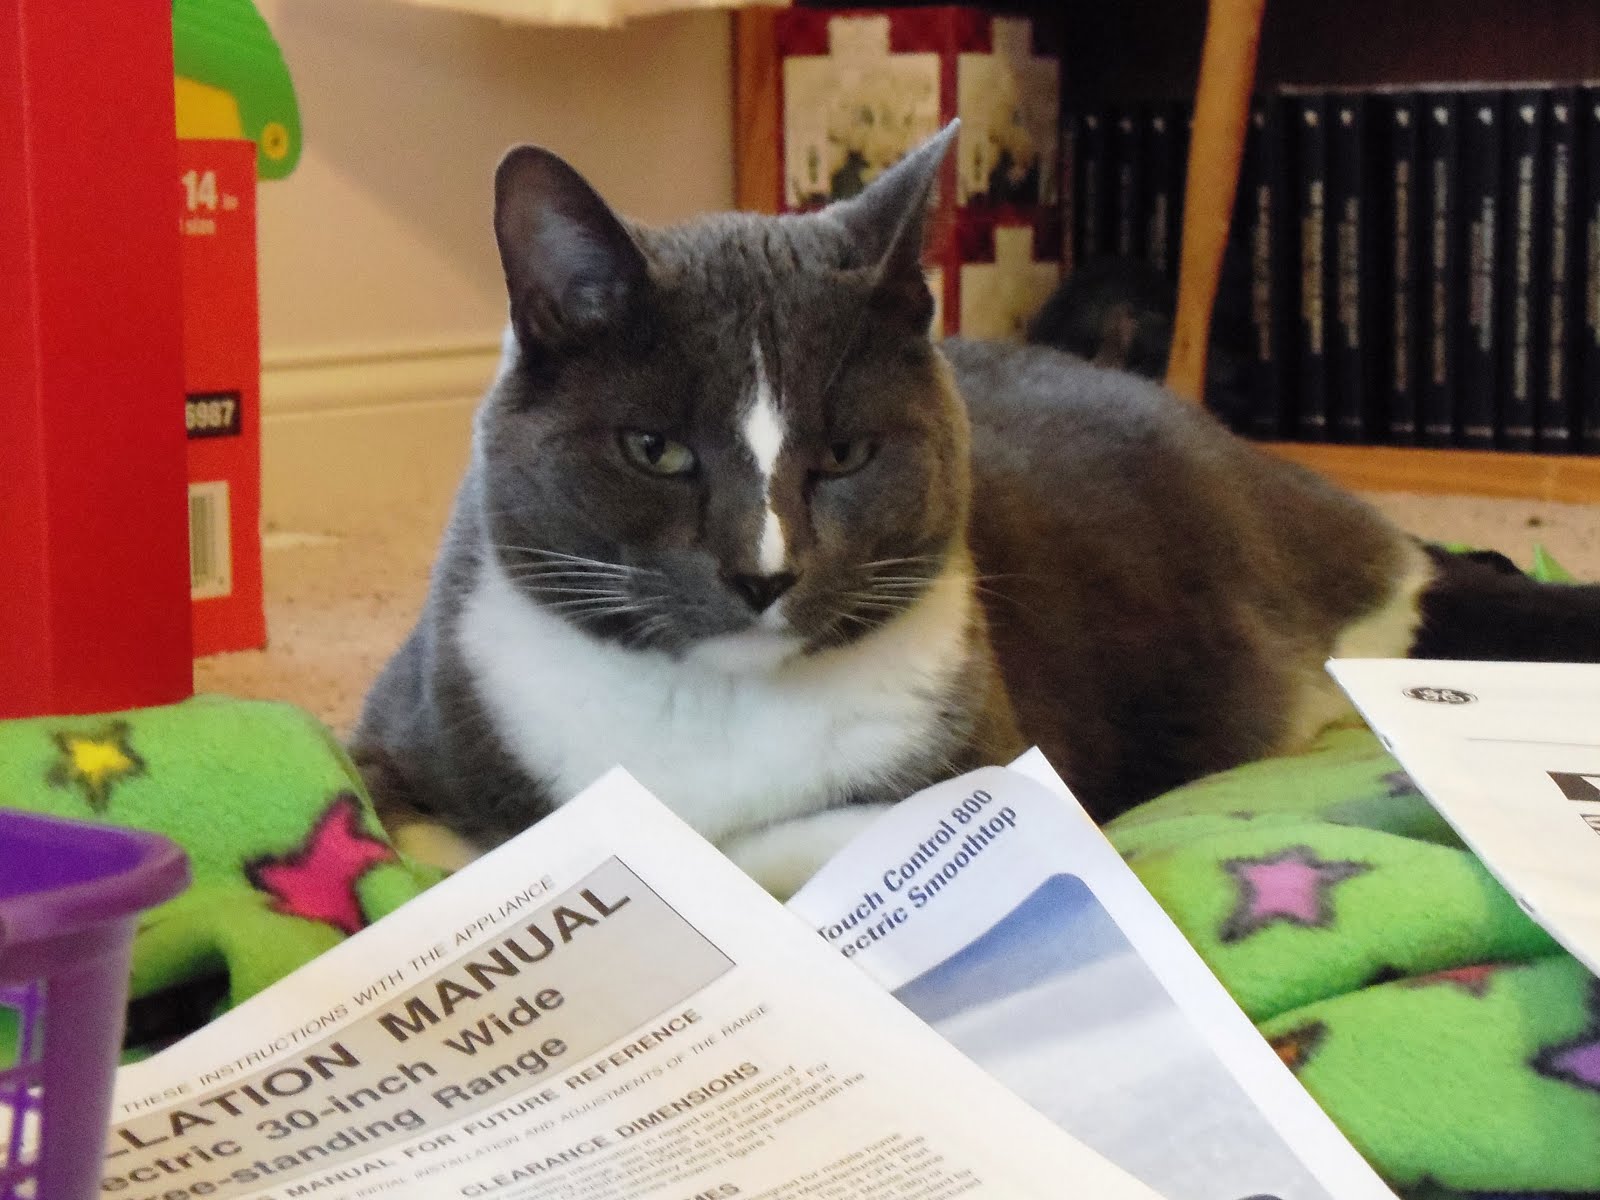
31 {More} Days of Pinterest: Day 8 Wrangling User Manuals
I know I'm really behind on posting what my projects have been. This is what happens when life happens, I guess.
Anyway. Here we go...
One of the projects that I've been meaning to do foryears awhile is to get all the user manuals for the various electronics, tools, appliances, and whatevers all in one easy to use place. This does not mean in a random basket that gets covered with other stuff...which is where they've been for years awhile.
The original pin for this organization idea came from a pin I saw on Pinterest from Desiring Virtue. My first thought when I saw that was literally, "Well, DUH." I already have a binder that I keep all the "how to run the house" information in, and it works fine.
With that in mind, I found an empty binder, some sheet protectors, and got out the user manual basket.

Of course I had my normal supervisor, Dart, to keep watch.

Then I got to work sorting them out, and trying to keep like with like.

Once I was done with that, I put the ones I was keeping in the sheet protectors, and recycled the rest. And there was quite a stack to be recycled.

Again, I kept like with like, but I didn't bother with using tab dividers or anything. Once I had them in order, I just put them in the binder.

Then just to be sure I'd remember what was in this binder, I made a quick cover sheet in Publisher and called it good. Now everyone in the family can find the user's manuals.

To see my other 31 {More}Days of Pinterest projects, click on the image below, and it will take you to my original post.
Anyway. Here we go...
One of the projects that I've been meaning to do for
The original pin for this organization idea came from a pin I saw on Pinterest from Desiring Virtue. My first thought when I saw that was literally, "Well, DUH." I already have a binder that I keep all the "how to run the house" information in, and it works fine.
With that in mind, I found an empty binder, some sheet protectors, and got out the user manual basket.

Of course I had my normal supervisor, Dart, to keep watch.
Then I got to work sorting them out, and trying to keep like with like.

Once I was done with that, I put the ones I was keeping in the sheet protectors, and recycled the rest. And there was quite a stack to be recycled.

Again, I kept like with like, but I didn't bother with using tab dividers or anything. Once I had them in order, I just put them in the binder.

Then just to be sure I'd remember what was in this binder, I made a quick cover sheet in Publisher and called it good. Now everyone in the family can find the user's manuals.

To see my other 31 {More}Days of Pinterest projects, click on the image below, and it will take you to my original post.
Monday, October 8, 2012
31 {More} Days of Pinterest: Day 7 Beadboard American Flag
I have a confession to make. I'm no artist. Wait, this isn't news?
I do, however, have a talent for mentally deconstructing someone else's projects and figuring out how to recreate them. Most of the time that's as far as it gets, but when I saw this beadboard flag at the Simply Kierste blog, I knew I could actually do this.
No, seriously. I had everything I needed downstairs in the basement.
I had lots of beadboard from when we built the house--it was used on the underside ceiling of the front porch:

I had the paint:

And I had the Frog Tape I love so very much.
I started by cutting a length of the beadboard to 3 sections of 16"x20", and hammered them together. The pieces are tongue and groove, but still need a bit of er, "persuading" every so often.
Once I got them together, they were kind of wobbly, so I nailed some 1" lattice on the back as stabilizers.

Although the pieces were the color that I wanted the base to be (kind of an off-white), it was outdoor paint. I hit it with some spray primer, then went over it with a couple of coats of Rustoleum's Heirloom White.
Once that had cured, I taped off the corner where I wanted the blue, and just started painting. I don't have any pictures because I inadvertently deleted them instead of saving them.
But the instructions on the original pin are very good, so follow them.
I cut out a reverse stencil of the star from cardstock, and held it in place when I painted the blue. I wasn't worried about crisp lines because that's not what this project is about. It's supposed to look like it's been around for awhile.
I also taped off the different rows of color because the blending of colors was bothering me. That added more time to the overall project because I couldn't tape on wet paint.
Here's the finished flag:

I'm undecided whether to leave it like this or to distress it with a palm sander. I'm not loving the shiny red, but maybe once I hit it with a good sanding it'll calm down some.
Start to finish, this was a approximately 4 hour project. Most of that was waiting for sections of paint to dry so I could tape off the next color and go.
To see my other 31 {More}Days of Pinterest projects, click on the image below, and it will take you to my original post.
31 {More} Days of Pinterest: Day 6 Using Borax to Clean Carpets
Well, during the 5 minutes I was waiting for the Microwave to be (mostly) self-cleaning, I went back to my "Clean ALL the Things!" Pinterest board to see about carpet spot cleaners.
There was one I'd pinned about a year ago for using Borax in a steam cleaner that was originally from a site called Love to Know, but on that same page was a recipe for mixing up a spot cleaner.
One thing about our carpet is that it's made of recycled pop bottles so theoretically stains are supposed to wick right off. In practice, though, not so much.
My home office is where the cats hang out with me when I'm working, and thus prone to all sorts of messes. Normally I use Nature's Miracle and/or Woolite Spot Shot, but I'm willing to give new things a try too. I tend to wait for a few spots to occur before using the Woolite because then I have to close up my office and the cats get cranky because their napping schedules get all messed up when they can't sleep in their normal places. Oh the things we do for our cats...
Here's the before:

And closer on one of the spots:

I got out all the ingredients I'd need:

It's an easy mixture to remember:
•¼ cup of salt
•¼ cup of borax
•¼ cup of vinegar

The instructions say to work it into the carpet, let it dry and vaccuum it up. So I did. Sort of.


I put it on, worked it in, and then went back to the microwave. Then a few hours later, once I remembered that I needed to vaccuum it up, I did.

Overall, it didn't get as much of the stain up as the Woolite would have, but it did OK.

To see my other 31 {More}Days of Pinterest projects, click on the image below, and it will take you to my original post.
31 {More} Days of Pinterest: Day 5 Cleaning a Microwave the Easy Way
It may seem like I'm pulling lots of projects off my "Clean ALL the Things!" Pinterest board, but these are things that I've wanted to try for some time. We have cats who like to "help" with projects, so I don't like using harsh chemicals when I don't have to, and the greener cleaners are always worth a shot.
This past weekend I tried more, with varying results.
The first one I did on Friday night was to attempt to clean the microwave using the hot water/vinegar trick.
And oh my goodness, it sure needed it.


I seriously cringed when I saw those...
ANYWAY.
The original pin came from the blog Crafty Little Gnome, and when I read their instructions, I thought, "I can do that. Easy."
I'd like to go on record as saying that if my life had a soundtrack playing so that I could hear it, this would've been the moment where the music got ominous in that, "THIS IS NOT GOING TO GO WELL" kind of way.
First, I assembled my supplies.

See what I mean? TWO THINGS. How could this go wrong?
So, I put the bowl of hot water and a glug of vinegar in the microwave:

I set the timer for 5 minutes:

And then I walked away.
When the timer went off, I came back.

It was time to wipe all the crud off. Yep.

Problem was, the crud didn't get the memo that it was supposed to be easy to wipe away. I put the bowl back in and set it for another 5 minutes:
This time didn't work much better, even with a plastic scrubby thing. I added some Barkeeper's Friend to the scrubber and went to it.

After a feweternities minutes, it was better:

I worked on it for awhile, and called it good.

I'm pretty sure this wasn't as magic as I'd hoped it would be for a combination of reasons. It's an OLD microwave, and it'd been awhile since it'd really been cleaned. Maybe if the crud hadn't been fossilized things would have worked better. I know it's not going to go like this for everyone, and I do believe in the power of steam cleaning. In this case, I'd have needed a steam ENGINE worth of steam, but hey.
Eh, win some, lose some, call a draw on the rest.
To see my other 31 {More}Days of Pinterest projects, click on the image below, and it will take you to my original post.
This past weekend I tried more, with varying results.
The first one I did on Friday night was to attempt to clean the microwave using the hot water/vinegar trick.
And oh my goodness, it sure needed it.


I seriously cringed when I saw those...
ANYWAY.
The original pin came from the blog Crafty Little Gnome, and when I read their instructions, I thought, "I can do that. Easy."
I'd like to go on record as saying that if my life had a soundtrack playing so that I could hear it, this would've been the moment where the music got ominous in that, "THIS IS NOT GOING TO GO WELL" kind of way.
First, I assembled my supplies.

See what I mean? TWO THINGS. How could this go wrong?
So, I put the bowl of hot water and a glug of vinegar in the microwave:

I set the timer for 5 minutes:

And then I walked away.
When the timer went off, I came back.

It was time to wipe all the crud off. Yep.

Problem was, the crud didn't get the memo that it was supposed to be easy to wipe away. I put the bowl back in and set it for another 5 minutes:
This time didn't work much better, even with a plastic scrubby thing. I added some Barkeeper's Friend to the scrubber and went to it.

After a few

I worked on it for awhile, and called it good.

I'm pretty sure this wasn't as magic as I'd hoped it would be for a combination of reasons. It's an OLD microwave, and it'd been awhile since it'd really been cleaned. Maybe if the crud hadn't been fossilized things would have worked better. I know it's not going to go like this for everyone, and I do believe in the power of steam cleaning. In this case, I'd have needed a steam ENGINE worth of steam, but hey.
Eh, win some, lose some, call a draw on the rest.
To see my other 31 {More}Days of Pinterest projects, click on the image below, and it will take you to my original post.
Subscribe to:
Posts (Atom)