Showing posts with label do it ourselves. Show all posts

Thursday, October 25, 2012

31 {More} Days of Pinterest: Day 11 Rocking the Side of the House

Yep. Rocking...as in putting down rocks. Also, rocking from the soreness the next day.

We've had a pile of decorative rock hanging out by our driveway for, oh, years. A few of them. Like 3. Enough so that it all is mostly invisible to me simply because it's always been there.

Sadly, I don't have a picture of it.

I do, however have some pictures of where we put the rock. Only the beginning and the end, mind, mostly because the camera battery ran out of juice midway through and had to be recharged.

I was looking for low-maintenance outside projects on Pinterest, and came across a few pictures that had rock patios. It got me thinking that hey, we already HAVE rocks, and a place that was in need of help.

No, it really needed help.

Here's a couple of before shots. Well, not exactly true befores because I'd already started pulling weeds and vines. Close enough.


Nice, huh?


Really classy. And oh, so welcoming. Sure, it's the back door, but that's the door that everyone uses around here.


We started by pretty much clearing it out. It already looked 5000% better. Steve tried to till it so that we could level it out, but the ground was way too hard.


So we watered it for a few days, then after a couple of mini-rainstorms, we came back to it. The camera was charging at this point, and I wasn't about to waste the beautiful day waiting for it, so there's no more pictures until the end.

We took some shovels and turned the dirt to give the tiller something to bite into, and picked out some larger rocks that had worked their way up.

Once it was tilled, we took rakes and leveled it out. Then we laid permeable landscape fabric down, making sure to overlap the layers between the rows. We used the landscape fabric because it allows water to drain--this is important because this is on the Northwest corner of the house, which gets snow, but not a whole lot of sunshine.

Then it was time to lay the rocks. Oh, my. We started by anchoring the overlapping fabric by putting rocks down on top, then on the corners. I found that using a rake to level it was slower than just using my foot, so that's what I did. It'll still settle over the winter, but that's ok. We have plenty more rock if needed.

Here's where we ended:


We're using the board as a temporary-over-the-winter edge. I think we may turn the corner of the house & rock all the way down the north side, especially since it gets hardly any sun, and it's all weedy and not particularly attractive right now.

To see my other 31 {More}Days of Pinterest projects, click on the image below, and it will take you to my original post.


Wednesday, March 21, 2012

Use It or Lose It: Round 2

In that same Closet of Doom, I had 4 mirrors that I'd meant to do something with for, well, awhile. But they were buried deep.


Last weekend I decided to work on spiffing up our front entryway. It's nice enough, but kind of dark. Some of that is the paint color, some of that is that it doesn't get much natural light except in the morning.


I figured that a mirror over the dresser would look good, and I had the perfect one for the job.


I found it last fall in an antique-y flea market kind of place and fell in love with the shape and the detailing at the top.


Here's where I decided to put it:


Some eye-balling (by me) and measuring (by Steve) later, it was up.


Ah, perfect.

I also had another mirror that I wanted to hang. Originally I only wanted the frame and was going to re-use the mirror somewhere else, because together they are REALLY heavy. I forgot to take a picture of the mirror itself, and the wall before, but here's where it ended up:


It's the long wall in the middle of the house. It'd be perfect for a gallery wall, but everytime I see a bunch of frames together on a wall I think how cool it looks, yes, but also, "Yeah. Soooo don't want to dust all those..." which makes it perfect for this mirror.

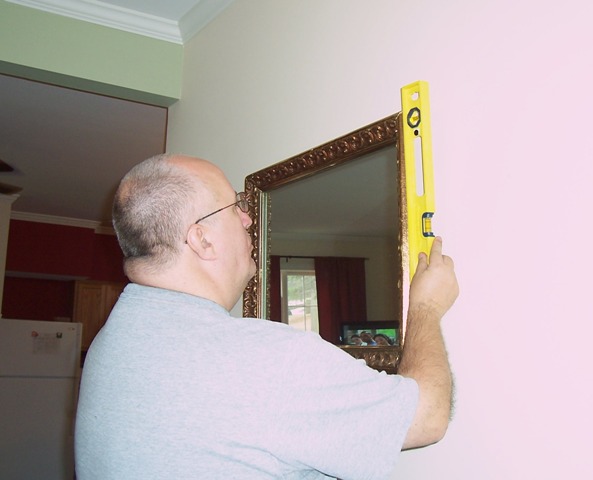
I had to have Steve hang it because I couldn't lift it that high without toppling over.


Then he checked to see if was level and all that:


Here it is, waiting for other things to be put up around it so it doesn't look like a random mirror on a random wall:


Here's a closer view of some of the detailing:


And just like that, two more things used. The other 2 mirrors are just awaiting their call to be useful. I know where I'm probably going to use them too. No, not back in the closet.

Running score: USE IT=2, LOSE IT=0

Wednesday, March 14, 2012

Use It or Lose It: Round 1

Buried in the side of the Closet of Doom were a couple of curtain rods that I'd originally bought last July to put in my husband's home office.


I could only find 2 at the time, but then he decided that he didn't want curtain rods (he has a sort of set of 3 windows in there), but wanted something like what I'd done in the laundry room instead.

I thought maybe I'd use them in my office instead, but hadn't gotten around to it yet. The more I looked at them, though, the more I thought they'd be too dark against the lighter colors.

Then one day I was walking down the hall and looked at the living room curtains and thought, "I really should take those down and wash...HEY! Those curtain rods would be PERFECTLY PERFECT IN HERE!!!!!" And, even better yet, the curtain rods that were currently in the living room would be PERFECTLY PERFECT in my office.

Here's where we started:

Living Room

Living Room

My Office

My Office

It should have been easy enough...but there were a couple of things I didn't forsee. Like the fact that to get the curtains back on the window in the living room that faces the driveway would be near impossible without taking down the brackets and threading the rod through first. Or the whole measuring thing (that always gets me, though).

In the end I perserved, and now have nifty looking curtain rods in the living room and actual curtains/curtain rods in my office.


Yes, I know the center bracket is off-center. It's where Steve's brother had originally put in the rod that's now in my office. We figured it'd be easier to re-use as many holes as we could. I can live with it...for now.


This is probably why Steve hates doing any home improvement projects with me. They tend to snowball. 'Install 2 curtain rods' became 'take down the living room curtains and curtain rods, then install 2 curtain rods, then install the 2 rods that were just taken down in another room, oh and add curtains'. And yes, it took about 3 hours. I don't think it would've normally taken that long had I not had to go back and re-do the shorter living room wall in order to thread the rod through the bracket BEFORE attaching said bracket to the wall.

Whatever.

It's DONE! And I like the darker rods in the living room against the red curtains. And I LOVE that I have curtains in my office. That helps finish a room.

USE IT=1, LOSE IT=0

Tuesday, November 1, 2011

31 Days of Pinterest: Framed Bathroom Mirror

This is the other project that went a bit off the tracks, but is in the process of being re-done...correctly this time.

When we built this house, we had decided to spend most of our money downstairs. Upstairs is the private area of the house, and therefore didn't need much wow factor. Now (a couple of years later), we're starting to do some of the little projects to give the upstairs some WOW.

One of the things I wanted to do was to frame out the bathroom mirrors.

I think I first saw this project on The House of Smiths. I had it in my project folder (pre-Pinterest), and thought it was easy enough to do this month.

Well, yes. It would've been...had I been paying closer attention.

Here's my crown molding being measured.

The top and bottom are 48" each; the 2 sides are 30" each. Eight 45° cuts and we're in business. Yay!

Except we were not.

Need a closer look?

Augh!!!

I had mistakenly flipped one of the longer pieces while I was cutting the angles, so the cuts were going the wrong way. I hadn't bought extra crown molding because, really? How hard could this be? :) (Um, lesson learned. Things can always be returned if not used.)

I have since purchased some more crown molding, so I will definitely finish this project and have an update on it.

To see my other 31 Days of Pinterest projects, click on the image below, and it will take you to my original post.
Friday, October 28, 2011

31 Days of Pinterest: Day 24 Framed Key


I've looked for these kinds of keys for awhile, but finally found some at Michael's for $1.50 each.

My inspiration for this project was this (among so many others I've seen):
(Originally from Not Just a Housewife)

I found the unfinished oval wooden frames at Michael's.

I primed them both using Rustoleum's primer. I don't know that they needed it, but I knew I would be spray painting them with a glossy black, so I wasn't taking any chances.

I let the frames dry overnight just to be sure the paint cured well enough to keep going.

I tried different colored scrapbook paper behind the keys before I decided my best bet would be something neutral. I found a picture of some fabric I like and used that. I printed it off on plain white cardstock just to give the backing some stability.

Once I had the paper, I traced the outline of the cardboard backing that had come with the frames onto it. I then glued the cardstock onto that backing using a glue stick, again just for some stability. Then I used the tacky glue to glue the key to the middle of the paper. I put the glue on the spots that actually touched the paper. I may have to go back and run a bead around it, which would be fine because it dries clear.

The last step was to go find a picture hanger thingy for the back. I eyeballed where the middle was, and the level-ness of it and hammered in the nails. The right side looks loose, yes, because it is. I couldn't find my really little nails, so I used what I had. If I'dve hammered that one all the way in, it would've come out the front, which is not exactly the look I'm going for...

I really like how it turned out. I may have to repaint the edges of the frame because the spray paint didn't seem to take as well there, but that can be remedied with ribbon or craft paint.

To see my other 31 Days of Pinterest projects, click on the image below, and it will take you to my original post.

Tuesday, October 25, 2011

365 Photos Day 296


296/365

Since I couldn't watch the football game I wanted to watch on Sunday, I decided it was a good time to finish up some non-painting house projects.

Have I ever said how much I hate puzzles? No? Well, I do. Not as much as I hate Brussel sprouts, but pretty close.

Anyhow, sometimes I shouldn't be allowed to put something together without supervision from a left-brained person.

I couldn't figure out why in the world my crown molding would NOT line up correctly. Seriously. Took me almost 2 hours to realize that I had flipped one of the pieces the wrong way when I cut it, so NO. There was less than no chance it would EVER line up correctly.

And did I buy enough molding to account for any mistakes?

C'mon, now. You should already know the answer to this one...

NO. I surely did not.

Sigh.

Wednesday, October 19, 2011

31 Days of Pinterest: Day 17 Beadboard Art Clip Holder thingy


I'm not sure what exactly to call this, besides a pretty easy way to display art on a rotating basis. So, we'll just go with "Beadboard Art Clip Holder thingy", unless someone can come up with a better name.

I wanted something like this in the laundry room both as a trial run, and because it'd help finish the room off.

This is a combination of a few ideas I've seen around the Internet.

I like the look of the IKEA Diginet wire with clips look:
(found on The Daily Buzz)

I also like the look of using something more natural, like clothesline or twine and clothespins:
(found on The View From Here)

But I wanted something neutral colored between the pictures/art/whatever that I put up and the wall, which is a light aqua blue. When I found this pin, I knew it would work--and even better, I had everything I needed on hand to make it.
(via the {This is Glamorous} blog)

I went in the basement to scope out our leftover beadboard from the wraparound porch ceiling.

There was one that was shorter than the rest, and I only needed 2 pieces that measured about 36" each, so I checked to make sure it was fairly straight.

Then I measured and made my cuts and lined the 2 pieces up to be sure everything was hunky-dory.


After that, it was time to put the 2 pieces together. This kind of beadboard is a tongue and groove design, so it should be as easy as putting them together. Mostly it is, but these 2 pieces needed a little bit of persuasion with a hammer.

In the past when I've used this beadboard to make things with, I've either glued the pieces together as insurance or nailed some braces made of lattice on the back. In this case, I'm just playing the odds and hoping it holds.

The paint that was on the boards already almost matches the trim throughout the house, but was a little dirty, so I gave it a quick once-over with some Rustoleum spray paint in Heirloom White and let it dry overnight. I didn't bother priming it first because it was more to make it uniform in color without a lot of fuss.

The next day I drilled some pilot holes for the longer screws I was going to use. They're cabinet screws, so I know they'll hold this up just fine.
Then I made sure it was level before screwing it in tight.

I drilled some pilot holes for the cup hangers and screwed those in.

I didn't measure how far apart to put the holes; I just made sure they were on the same level.

Then it was time to get the binder clips and some art on there.

These are pictures from a 2009 Art page-a-day calendar that I liked. I love that I can change out the art whenever I want without having to mess around with a frame.

To see my other 31 Days of Pinterest projects, click on the image below, and it will take you to my original post.